We just posted an instructional video on YouTube to help you skin and dye your ballistic nylon kayak. Check it out here:
https://www.youtube.com/watch?v=RtbuHnB-vNk
Tuesday, April 22, 2014
Thursday, April 3, 2014
Plans for the Albatross 12 & 14 are now ready for you to order!
Each set of plans includes complete instructions to build a kayak, including detailed cutting instructions, full sized frame templates, building instructions, and a #8 countersink drill bit.
http://www.blackdogkayaks.com/rec.html


Each set of plans includes complete instructions to build a kayak, including detailed cutting instructions, full sized frame templates, building instructions, and a #8 countersink drill bit.
http://www.blackdogkayaks.com/rec.html
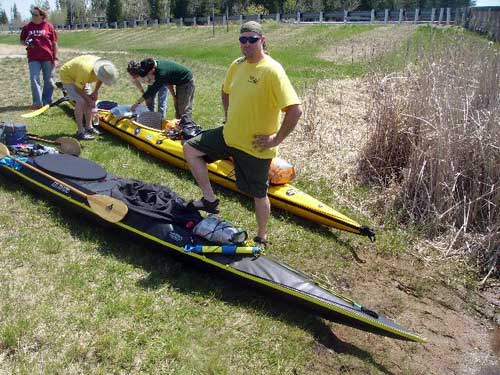
Jeff's Albatross 14
Lynn in the Albatross 12
Leah in the Albatross 14
Wednesday, March 26, 2014
Finally, and update!
Finally, an update! April 4, 2014, we will be releasing the plans for
the Albatross 14. June will bring the Greenland plans, and further
models will follow.

Lightweight Kayak Camping
Lightweight Kayak Camping

On our 2006 trip to the Apostle Islands, our group tried to pack with the mentality of an ultralight backpacker. While we didn't saw the handles off of our toothbrushes or cut the zippers out of our sleeping bags, by thinking light, we were able to pack significantly lighter than the average kayak camper. This was done by necessity since we were paddling skin-on-frame kayaks, with less internal volume and smaller, or no hatches, as opposed to a fiberglass or plastic kayak with large hatches and voluminous space between the bulkheads.
Much of what can be packed into a skin-on-frame kayak is limited to how far one can reach into the kayak from the cockpit. Sure, you can shove it up toward the peaks, but can you reach it to get it out again? Some paddlers have solved this by rigging a pulley system with a rope and a snaplink. When the kayak is packed, the item is attached to the snaplink and pulled up toward the bow or stern with the rope. In order to unpack, another rope is used to pull it back down.
But it is not only skinboaters who can benefit from ultralight kayak camping. With the growing popularity of Greenland style rolling, "low volume" fiberglass kayaks are becoming more common. With low freeboard and limited weight capacity, they make less than ideal camping vehicles for more than a quick overnight trip. But, by applying lightweight backpacking principles, the low volume kayak becomes adequate for light expeditions.
Lightweight Kayak Camping has other advantages as well. Just as in backpacking, if you are carrying less weight, you will work less to cover more distance. That means less strain on your body as well as less calories burned. A light packing weight will also keep your kayak closer to the weight that you ordinarily paddle on a day trip, which makes the handling of the kayak more familiar and predictable.
If you are able to pack light enough, you may even find that you don't need to unpack the kayak to portage or to carry the kayak up the beach to the campsite. A lightweight approach to packing also means less time spent setting up camp, resulting in more time to enjoy the camp and the surrounding area. In the morning, when it comes time to break camp and pack up, the lightweight kayak camper will spend less time packing the kayak, making it possible to get on the water earlier to take advantage of the calm weather that usually comes with the morning.
Lightweight Kayak Camping should be approached in a very thoughtful manner, not only in what you choose not to bring, but in what you choose to bring. It can be annoying to your paddling partners if you are constantly having to ask to use something that you forgot to bring. That said, you should coordinate with your kayak camping partners so that you can minimize redundant packing. E.g., everyone needs a sleeping bag, whereas you only really need one camp stove and one water filter (although having a backup can be nice).
Underpacking is not only annoying to your partners (toilet paper?), it can also be dangerous. E.g., if the weather turns cold or you wet exit and need to change into dry clothing to avoid hypothermia, you may regret not packing those fleece pants and jacket.

Paddling Equipment
You really have no choice on much of what you take on a kayak camping trip. You have to take everything that you would ordinarily bring on a day paddle, such as a paddle, a PFD, spray skirt, bilge pump, etc. To that list you should add an extra paddle and flotation. In our skinboats we use a combination of flotation bags and a sea sock, or cockpit liner.
A cockpit cover is nice to have to keep rainwater and critters out of your kayak at night, although you can use your sprayskirt as a makeshift cover, which saves a few ounces of weight. A few ounces? The lightweight philosophy begins with thinking light. Competitive swimmers shave off all of their body hair because it makes them feel faster. Likewise, shaving ounces off of your overall load makes you feel lighter.
That said, your paddling gear does not count toward your packing weight. Again, paddling gear is gear that you would ordinarily take with you whether you're going out for an hour, a day, or a week.
Water
The biggest weight savings that has proven itself in our journeys has been in terms of water. Most kayak packing lists tell you to pack water in a collapsible container behind the seat of the kayak. Well, a gallon of water weighs just over eight pounds, while a water purifier weighs only eleven ounces, and water purification tablets weigh even less than that.
Of course, if you're paddling in a salt water environment, there was a time when you had no choice but to carry gallons of fresh water. But, as water purification technology improves, portable desalination systems are becoming easier to find as well as more affordable. Most notable among the portable solutions is the Katadyn Survivor 35 manual desalinator. While it comes with a hefty price tag and a two pound weight, the tradeoff may be worth it. Consider that, even for a weekend saltwater trip, at a minimum of a gallon of drinking water per day, you would be carrying at least three gallons of freshwater, for a total weight of twenty-four pounds. A less expensive, but heavier option than the Katadyn system would be a Sea Pack passive desalination system. At a cost of less than a hundred dollars, the Sea Pack system produces 2.5 liters of water per use, but requires a fresh syrup pack for each use at a cost of around two dollars per liter. For a short, unsupported trip, this is a cheaper option. For longer, or more frequent trips, or, with larger group, systems such as the Katadyn become a better value. PERHAPS THE DESALINATION SYSTEM DISCUSSION WOULD BE BETTER IN A SIDEBAR DISCUSSION.
Clothing
Remember that your base kayak weight already includes such items as a drytop, wetsuit, drysuit, PFD, etc., so these items do not count in your packing weight.
The first question that you should ask yourself when you pack your clothing is, "What's the weather going to be like?" Pack accordingly. If you're wearing a wetsuit, you should have a long sleeved shirt to wear if it's cool and a short sleeved shirt to wear if it's hot. Furthermore, what will you be wearing in camp? Dry clothes make for a comfortable night around the campfire. Besides that, a dry change of clothing can literally be a lifesaver if you get wet.
The second question that you should ask yourself is, "Will I be going into town?" If the answer to that question is, "Yes," then you also need to pack a separate bag of town clothes. Face it, no one at the local bar or restaurant wants to sit downwind of someone who's been paddling in the same shirt for four days.
Finally, you should consider what you'll wear when you're sleeping. Shorts? Fleece? Nothing? The answer may determine how light of a sleeping bag you are able to carry. Freezing at night makes for an uncomfortable night's sleep, which means no rest, which means cranky campers. Take what you need to sleep comfortably. Your body and your paddling partners will appreciate it.
Shelters
Shelter should be the first item on your packing list.
Two man tents
When considering how large a tent you need, the rule of thumb is to take the tent capacity rating and cut it in half. So a two man tent is just right for one camper plus gear, a three man tent is adequate for two campers, and so on. Thanks to the lightweight hiking movement, tents are becoming more lightweight in smaller packaging. When packing, consider whether or not you can consolidate with your camping mates.Bivy tents or bivy bags
Hammocks
Tarp camping
Sleeping Systems
If you are already packing a fleece jacket and pants, it is possible to bring a sleeping bag or quilt rated for a much warmer temperature than what you'll be facing. If the temps will be in the low fifties or high forties, bring a bag rated for summer temperatures and sleep in your fleece. Sleeping with socks on your feet and a light stocking cap on your head will also boost the temperature rating of your sleeping bag.
Sleeping bag insulation comes in two flavors, down and synthetic fill. While a down sleeping bag is lighter and more compressable, it loses its insulatory ability if it gets wet. Synthetic insulation retains some of its insulating properties even when wet, plus it dries faster than down. Whichever you choose, a wet sleeping bag makes for an uncomfortable night, so the sleeping bag should be double bagged, first in a plastic contractor bag, then a waterproof bag.
The sleeping quilt is becoming more popular with backpackers becaue of its lighter weight. A sleeping quilt is essentially a sleeping bag that you pull over yourself rather than climbing into. The warmth of any sleeping system comes from the loft, or the air space of the insulation inside the shell. Inside a sleeping bag, the body's weight compresses the bottom of the sleeping bag and the loft is lost. Insulation then becomes a matter of having an adequate ground pad underneath the sleeping bag. Since a sleeping quilt goes on top of the sleeper, it is almost half the size of a sleeping bag rated for the same temperature, saving both space and weight. In cold temperatures, a sleeping quilt also makes it possible to carry twice the insulation in the same space as a sleeping bag rated for much warmer weather. Often the foot is sewn closed to form a "foot box" so that your feet don't find their way out from under the quilt.
A stuff sack filled with your extra clothing makes a good pillow. If you prefer something larger, a paddle float or a hydration bladder with a t-shirt for a pillow case works well.
Stove and Utensils
Again, for cooking, the lightweight kayaker can learn a lot from the ultralight backpacker.
No matter what type of stove you select, you will have to carry fuel. Bottles of alcohol, white gas, propane, butane/propane mix, etc.,
A cup, a spoon or spork, a plastic bowl.
Food
While food, technically, is not included in your packing weight, it is an item that caa make a big difference in your total paddling weight. Figure on two pounds of food per day. Dehydrated or dried food is becoming more palatable. Perishable foods that have traditionally been packaged in cans are now available in foild packaging. Rice and pasta dishes are now available in meal size bags and require only boiling water to make a full meal. Whatever you bring to eat, ditch the carboard boxes and other extraneous packaging. Loose items, such as packets of oatmeal, rice entrees, tuna or salmon packages, should be bagged in large zipper type plastic bags. Coffee, hot chocolate, energy drink mixes, etc., should also be packed into a plastic zipper type bag. Doing so not only saves weight and space, but also reduces the amount of trash that you will generate along the way. Wine should be purchased in a bag. Other adult beverages should be purchased in (or repackaged in) a plastic bottle.
Miscellaneous/Comfort Items
Toiletries fall under the category of miscellaneous items. Toothbrush and toothpaste, a razor, toilet paper, etc., should go into a seperate ziplock bag or small drybag. Firestarters should go in a drybag as well. Another small drybag should be set aside for things like your MP3 player, something to read, campsite past times, etc. A couple of candles make dinner more enjoyable as it's easier to see your food and less obnoxious than an LED headlamp. Extra batteries should also go into a ziplock bag. Organizing miscellaneous items into their own drybags by category not only keeps these items dry, doing so makes it easier to find these items in camp.
Conclusion
Going lightweight kayak camping does not have to mean that you are going to be uncomfortable, or even that you have to give up anything. Even if you decide that the handling benefits of lightweight kayak camping are not for you, going lightweight means that you'll have more room and weight bearing capacity to carry more camping luxuries. Paring down your total weight means that you can bring that extra bag of wine, a camp chair, or more food.
SIDEBAR
Lightweight Packing List
I started with a thirty-five pound kayak. Add to that ten pounds of paddling gear, for a base kayak weight of forty-five pounds. With the addition of twelve pounds of Camping and Comfort gear, the total weight came in at fifty-seven pounds. This is the starting weight of a lot of kayaks before the addition of camping gear!
Paddling Gear: Paddle(s) Sprayskirt PFD Bilge Pump Paddle Float Flotation Wetsuit or Drysuit Drytop Paddling Shirt Paddling Footwear Helmet First Aid Kit Repair Kit Water Bottle or Hydration System Cockpit Cover Radio Cell Phone Strobe Light Knife Towing System
Camping Gear: Drybags Shelter Sleeping System Stove Cookwear Cooking Utensils Eating Utensils Water Purification Fleece Jacket
Tuesday, December 23, 2008
Mark Hospitalized
I just wanted to let everyone know that Mark was hospitalized on Saturday night with a heart issue. He stayed overnight and has returned home and is recovering. It wasn't a heart attack, so he will be back in the shop soon.
There will, however, be a one week delay on orders.
Thanks for your understanding!
There will, however, be a one week delay on orders.
Thanks for your understanding!
Joel
Sunday, October 19, 2008
Just in time for the building season - New Skins!
 Jeff's Greenland Style Kayak by Black Dog Kayaks skinned in Ballistic Nylon with
 optional Black Dog Kayaks Deck Rigging Kit
Builders have voiced concerns with the vinyl coated polyester skin, suggesting that it's too difficult for a beginning builder to work with and get a wrinkle free finish. Well, we listened to you, and have changed our kayak skin over to 850 denier ballistic nylon coated with a two part urethane. The new fabric is an old favorite with traditional builders and has been proven over time to be very durable and easy to use. Our ballistic nylon is fully heat shrinkable, can be dyed in the color of your choice using an acid dye, or left white for a translucent finish after coating with urethane.
 Jeff's Albatross 14 (tan) skinned with PVC and his Black Dog Greenland Style Kayak (blue) skinned with Ballistic Nylon
No sewing is required. The skin is draped over the kayak hull, stretched, and stapled at the sheer line. The frame is then turned over and the skin is applied to the deck using the same method. This is followed by heat shrinking using an iron or a heat gun. The two part urethane is then mixed and applied to the skin and left to cure. The urethane seals any holes left by staples and provides a watertight seal and bond between the deck and the hull.
Subscribe to:
Posts (Atom)